Gmail Forwarding and Filters – Skip the Inbox Trick
An employee left one of our clients and they were sun-setting a project that employee had been in charge of monitoring. They had a public email address that they wanted to have another staff member continue monitoring, but they didn’t want this staff member to have their inbox overloaded. So the solution we came up with was to forward the email address to them and set up a Gmail filter for them so that messages sent to this address would avoid the inbox entirely.
How To Take Care Of Gmail Forwarding
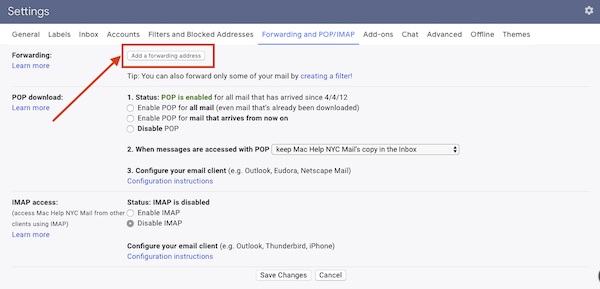
Here’s how we did that. First we set up forwarding from the old account by logging into it in Gmail, then going to Settings > Forward and POP/IMAP and adding a forwarding address:

We followed the prompts there to confirm the address was now forwarding correctly. Then we went to the employee’s account and set up the filter. We went to Settings > Filters and Blocked Addresses, scrolled down on the page, and clicked Create a new filter.
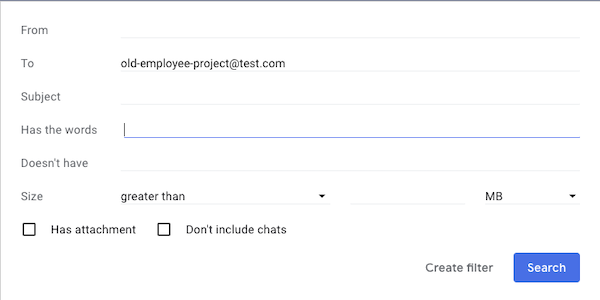
In the filter settings that popped up we put the old email address for which we just set up forwarding in the To: field and then hit Create filter:

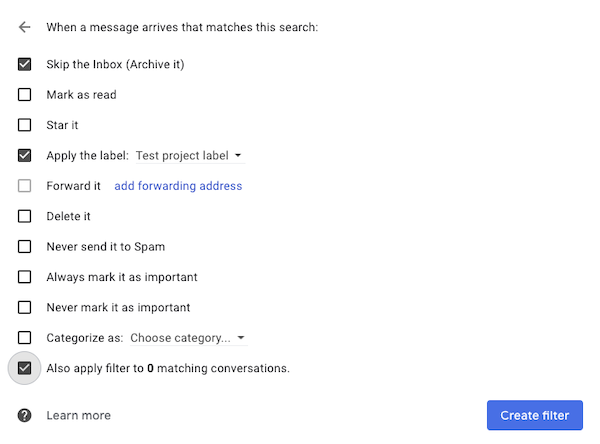
That opened the filter settings page. So we checked “Skip the Inbox (Archive it)”, “Apply the label” (and created a label that made sense), and finally “Also apply filter to matching conversations”. Then we hit Create filter.

And that’s all there was to the gmail forwarding. Now the email account is monitored and the user’s inbox is unencumbered by tons of extra emails.

 ALL BLOGS


